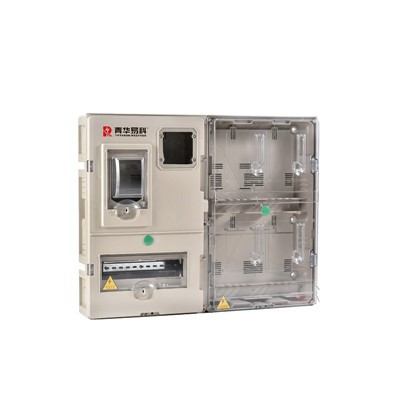
Hey there! I’m a supplier of slope socket boxes, and I’ve seen firsthand how important it is to secure these boxes properly during installation. A well – secured slope socket box not only ensures the safety of your electrical connections but also extends the lifespan of the equipment. So, let’s dive into some practical tips on how to secure a slope socket box during installation. Slope Socket Box
Pre – installation Checks
Before you even start installing the slope socket box, there are some key pre – installation checks you need to do. First off, inspect the box itself. Look for any cracks, dents, or other signs of damage. A damaged box won’t offer the proper protection, and it could also lead to electrical hazards. I’ve had customers who skipped this step and ended up with connection problems later on.
Next, check the mounting surface. It should be flat, clean, and strong enough to support the weight of the box and any devices that will be connected to it. If the surface is uneven, you might have trouble getting the box to sit right, and it could loosen over time. Use a spirit level to make sure the surface is level, and if it’s not, you may need to use shims to correct it.
Also, make sure you have all the necessary tools and materials. You’ll need a drill, appropriate screws, a screwdriver, and maybe a measuring tape. Having everything ready before you start will save you a lot of time and hassle.
Choosing the Right Location
Picking the right spot for your slope socket box is crucial. You want to choose a location that is easily accessible for maintenance but also protected from potential damage. Avoid areas where there is a lot of foot traffic or where the box could be knocked into. For example, don’t install it near a door that swings open forcefully.
Another thing to consider is the proximity to other electrical components. The box should be far enough away from power sources to prevent interference but close enough to make wiring easy. I usually recommend a distance of at least 12 inches from other major electrical equipment.
The location should also be dry. Moisture can cause corrosion and short – circuits, which can be extremely dangerous. So, avoid installing the box in areas prone to water leaks, like basements with a history of flooding or near sinks.
Marking the holes
Once you’ve chosen the location, it’s time to mark the holes for mounting. Use a pencil or a marker to make clear marks on the surface where the screws will go. Make sure the marks are in line with the holes on the back of the slope socket box. You can use a measuring tape to double – check the spacing.
If you’re installing multiple boxes side by side, it’s important to keep them evenly spaced. This not only looks better but also makes it easier to connect the wiring later. I usually use a straightedge to ensure the marks for multiple boxes are in a straight line.
Drilling the holes
Now comes the drilling part. Before you start, make sure you’re using the right drill bit for the type of surface you’re working on. For example, if you’re drilling into wood, a regular wood drill bit will do the job. But if it’s concrete or brick, you’ll need a masonry bit.
Drill the holes carefully, making sure they’re the right depth and diameter for the screws you’ll be using. If the holes are too shallow, the screws won’t hold properly, and if they’re too deep, the box may not sit firmly. I always recommend starting with a small hole and then gradually increasing the size until it’s just right.
When drilling, hold the drill steady and apply even pressure. Don’t rush, as this can lead to mistakes like misaligned holes or broken drill bits.
Mounting the slope socket box
With the holes drilled, it’s time to mount the box. Place the box against the wall, aligning the holes on the back of the box with the holes you drilled in the surface. Then, insert the screws into the holes and start tightening them with a screwdriver.
Don’t tighten the screws all the way at once. Instead, tighten them a little bit at a time, moving around the box in a criss – cross pattern. This helps to ensure that the box is evenly secured and doesn’t get warped. Keep checking that the box is level as you tighten the screws. If it starts to tilt, loosen the appropriate screws and readjust.
Wiring and Final Checks
Once the box is mounted, it’s time to do the wiring. Make sure you follow all the electrical codes and safety procedures when doing this. Strip the wires to the right length and connect them to the appropriate terminals in the box. Use wire nuts or other approved connectors to secure the connections.
After wiring, do a final check of the installation. Make sure all the connections are tight, and there are no loose wires. Check that the box is still level and firmly attached to the surface. You can give the box a gentle tug to test its stability.
If everything looks good, you’re almost done. But don’t forget to test the electrical connections. Plug in a device to make sure the power is flowing correctly and there are no short – circuits.
Importance of a Professional Installation
While it’s possible to install a slope socket box on your own, there are many advantages to hiring a professional electrician. Electricians have the experience and knowledge to handle any issues that may come up during the installation. They also know all the local electrical codes and can ensure that your installation is safe and up to standard.
I’ve seen cases where DIY installations have led to serious problems, like electrical fires or short – circuits. So, if you’re not confident in your electrical skills, it’s best to leave it to the pros.
Wrapping Up
Securing a slope socket box during installation is not that difficult as long as you follow these steps. From pre – installation checks to final testing, every step is important to ensure a safe and reliable installation.

If you’re in the market for high – quality slope socket boxes or have any questions about installation, don’t hesitate to reach out. We’re here to help you get the best products and the information you need for a successful installation. Whether you’re a professional electrician or a DIY enthusiast, we’ve got the right slope socket box for you. Contact us today to start the conversation and explore our wide range of products!
References
ABS Plastic Junction Box Electrical Installation Standards Handbook
Home Electrical Safety Guide
Slope Socket Box Manufacturer’s Manual
Shandong Qinghua Yike Electric Co., Ltd.
As one of the most experienced slope socket box manufacturers in China, we also support customized service. We warmly welcome you to buy durable slope socket box for sale here from our factory. If you have any enquiry about cooperation, please feel free to email us.
Address: No. 378 Taozhuang Village, Zaoyuan Town, Lanshan District, Linyi City, Shandong Province
E-mail: admin@sd-qhyk.com
WebSite: https://www.qhecobox.com/